
Chart Export Tutorial
Video Tutorial
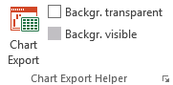
Ribbon
- <Chart Export> opens the Chart Export Menu
- <Export chart selection> opens the Chart Export Menu filtered to the charts that the user has selected (using control and clicking onto the chart)
- <Chart transparent> <ets chart area, plot area and border of selected charts to transparent
- <Chart visible> Sets chart area, plot area and border of selected charts to visible
Menu for basic chart export functions
Basic steps "chart export"

1. Select charts from Listbox
2. Select the export location, e.g. all charts onto a new slide each
3. Press <export> for newly adding chart images to a presentation
Basic steps "chart update"

1. Select charts from Listbox
2. Press <update> for replacing old charts in an open presentation with updated charts
The code will now loop through every chart image in PowerPoint and replace the old image with a current one, if the 'unique identifier' is the same (e.g. worksheet & chart name).
Determining the sequence of exported chart images
The chart images will be exported in the same order as on the listbox.
The listbox can be sorted by ...
- Alt title (alternate title)
- Chart name
- Chart title
We recommend to assign a number for ordering to the 'alt title' property.
Features for convenience

- The listbox can be filtered by ...
-
- No filter = all charts in workbook
- Active sheet = all charts on active worksheet
- Chart sheet = all charts on chart sheets (i.e. not embedded into a worksheet)
- Charts in ppt = all charts that have chart images in the PowerPoint presentation, which is currently open
- <Go to> - Navigate to the chart selected in the listbox
- <Edit> - Edit chart name and alt(ernate) title
Settings Menu

- Select image format for export to PowerPoint: enhanced metafile, png, jpg
For most purposes, enhanced metafile provides the bes resolution - Set the background color
- Transparent (even if the Excel is not)
- 'As in Excel'
- Custom color for background and border
Set your custom color by clicking on the rectangle and selecting a cell in Excel that has the fill color and the border color that you want.
- Set the chart image's position on the slide by determining the upper left corner's distance to the top of the slide and to its left border
- Set the size of the chart
- unticked = same as in Excel
- ticked 'use custom'
- Option: Set both height and width
- Option: Either height or width. The other will be chosen according to the height/width ratio of the original. This is the recommended option, as enforcing both might lead to stretching the picture.
- Assign an image name. This is important as the image name will serve as a unique identifier for updating/replacing the chart later on.
- Option: Worksheet name & chart name in combination (recommended)
- Option: Chart name only (only usefull if every chart name is unique to the workbook)
- Option: Use 'alt title' (causes a bit more work, because you will have to assign alt titles to your charts and you cannot use this property for sorting)
- Chose meta information that you want to attach to the chart image and/or to the slide
You can chose what information to keep and where. We recommend to keep at least the file and the chart name, to make sure you can trace back a chart image's original data for any version. - There are particular options for updating charts
- You can chose to either maintain the size of the to be replaced chart image in the ppt or the original size in xls or you can use the custom height and/or seize from the form
- You will want to monitor which charts have been updated. Ticking these options will help.
- <Keep replaced image> will move the old image out of the visible area of the slide, so that you can see both in the editing mode.
- <Keep track in an update log> will create an extra slide with the image names, which have been successfully replaced
- You can save your prefered settings as the default setting. Opening the menu next time will show your options. After having made changes, you can go back to your default by pressing <Load default>.